However a customer finds you, they should land in the same booking flow, and it should look like you. This guide covers your hosted booking link, branding the page, adding it to your own website, and reading the numbers afterwards.
1. Get your booking link
- 1
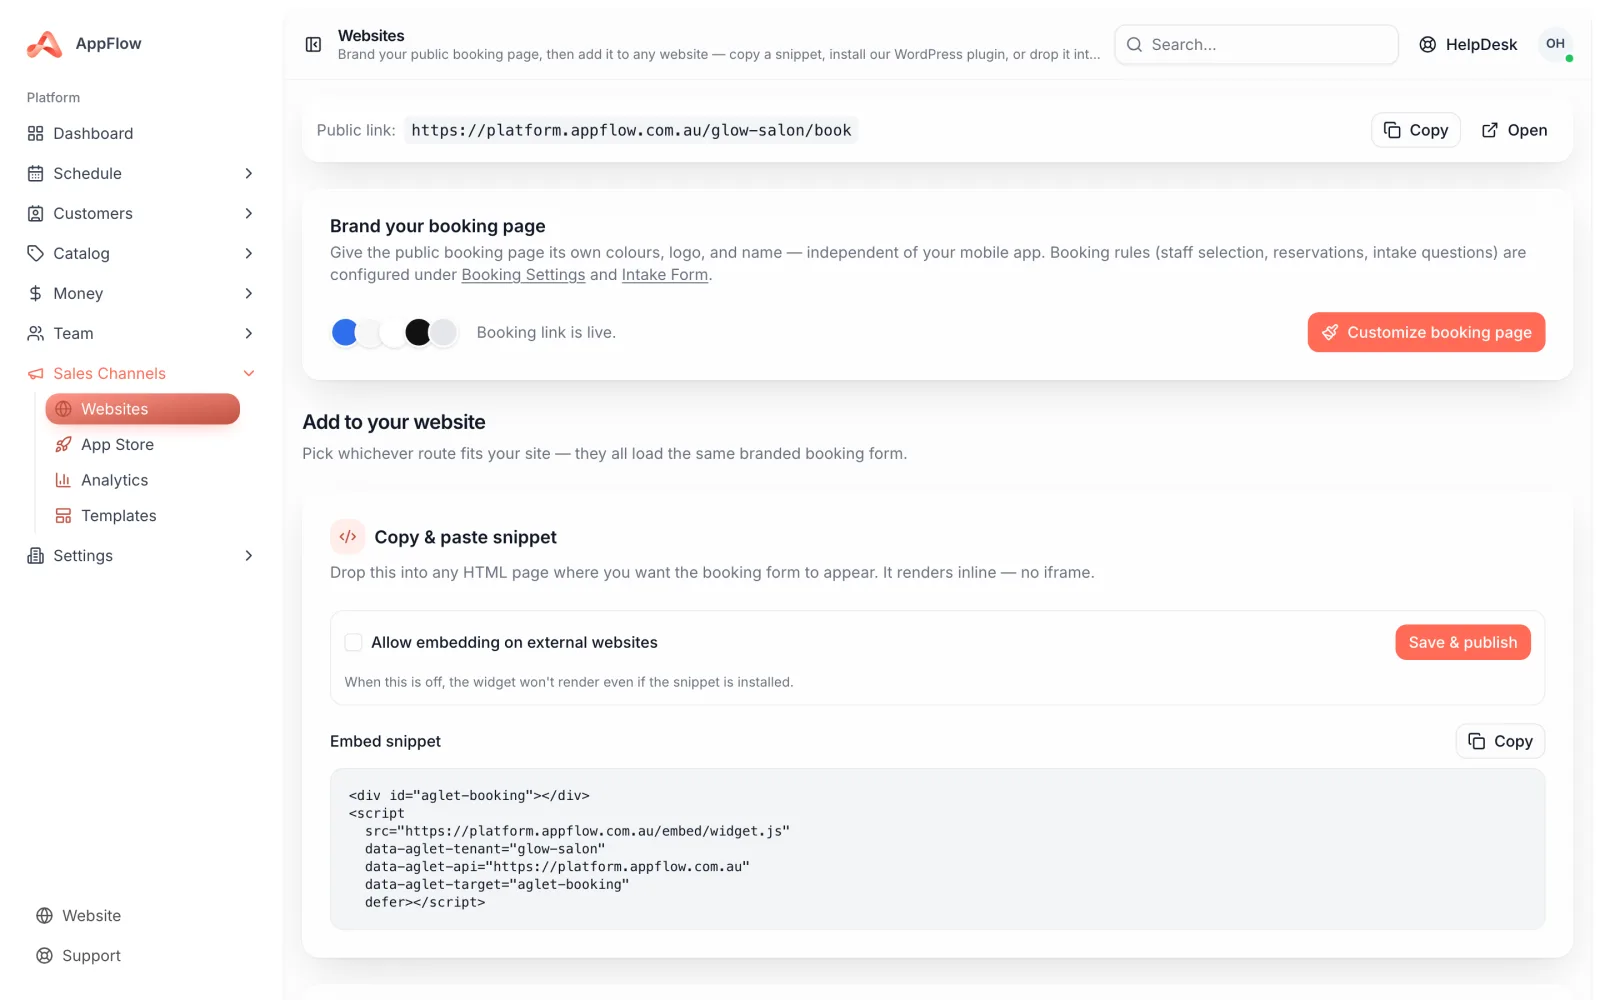
Open Websites under Sales Channels
You will see your public link at the top, built from your own slug. This is the address you can share anywhere.
- 2
Choose your slug
Set it under Settings, then Business. Keep it short and obviously yours: it is the part customers see and read out.
- 3
Copy and share it
Use Copy, then put it in your Instagram bio, your Google listing, your email signature and your booking confirmations.
2. Brand the booking page
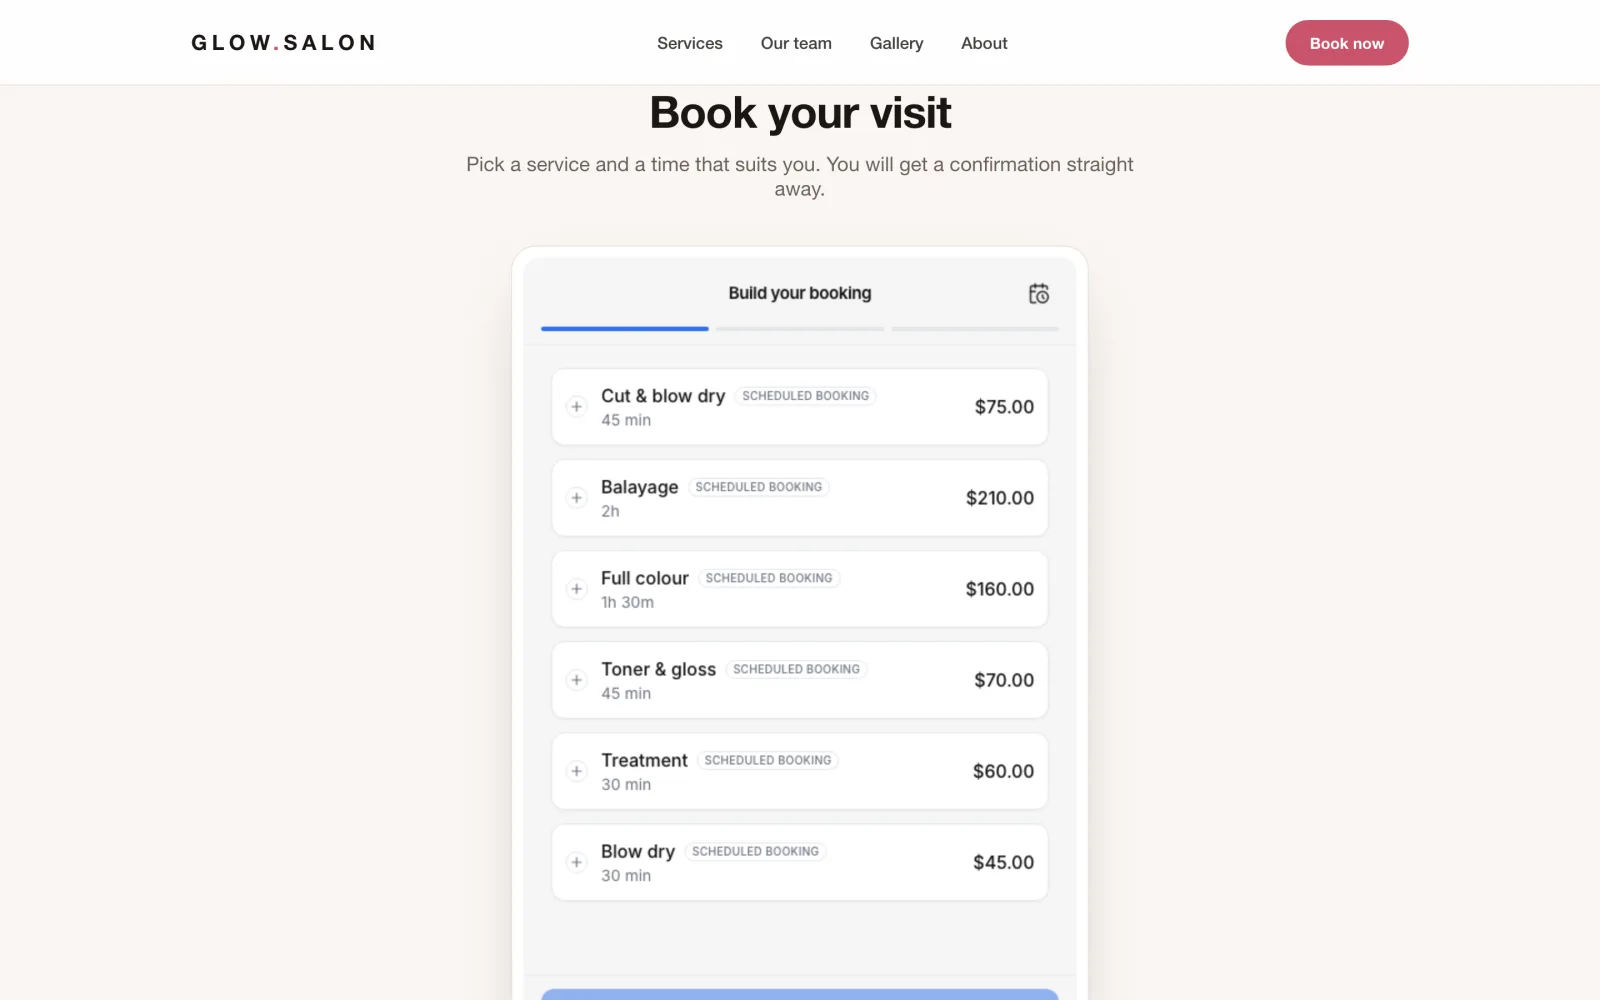
Your booking page carries your business name, your brand colour and your logo, with corner rounding to match the rest of your brand. Choose Customize booking page to set them, and the whole flow follows: buttons, highlights and cards all pick up your colour.
Start from your trade
Pick your industry during setup and your services, durations and intake questions arrive already shaped for the work you do, so the page looks right before you have changed a thing.
3. Add booking to your own website
- 1
Copy your embed snippet
Under Add to your website, copy the snippet. It is one short block of code and it renders the booking form inline, with no iframe and no style clashes.
- 2
Paste it into your page
WordPress: add a Custom HTML block, or install the AppFlow plugin and use the shortcode. Squarespace and Wix: use an Embed or Code block. Custom sites: paste it into your template.
- 3
Allow embedding, then publish
Switch on embedding for external websites and choose Save and publish, otherwise the widget will not render even once the snippet is in place.
4. Print a QR code for the counter
The same link works as a QR code. Put it on the counter, on a window sticker or on a van, and a customer can go from standing in front of you to booked on their own phone.
5. See which channel wins
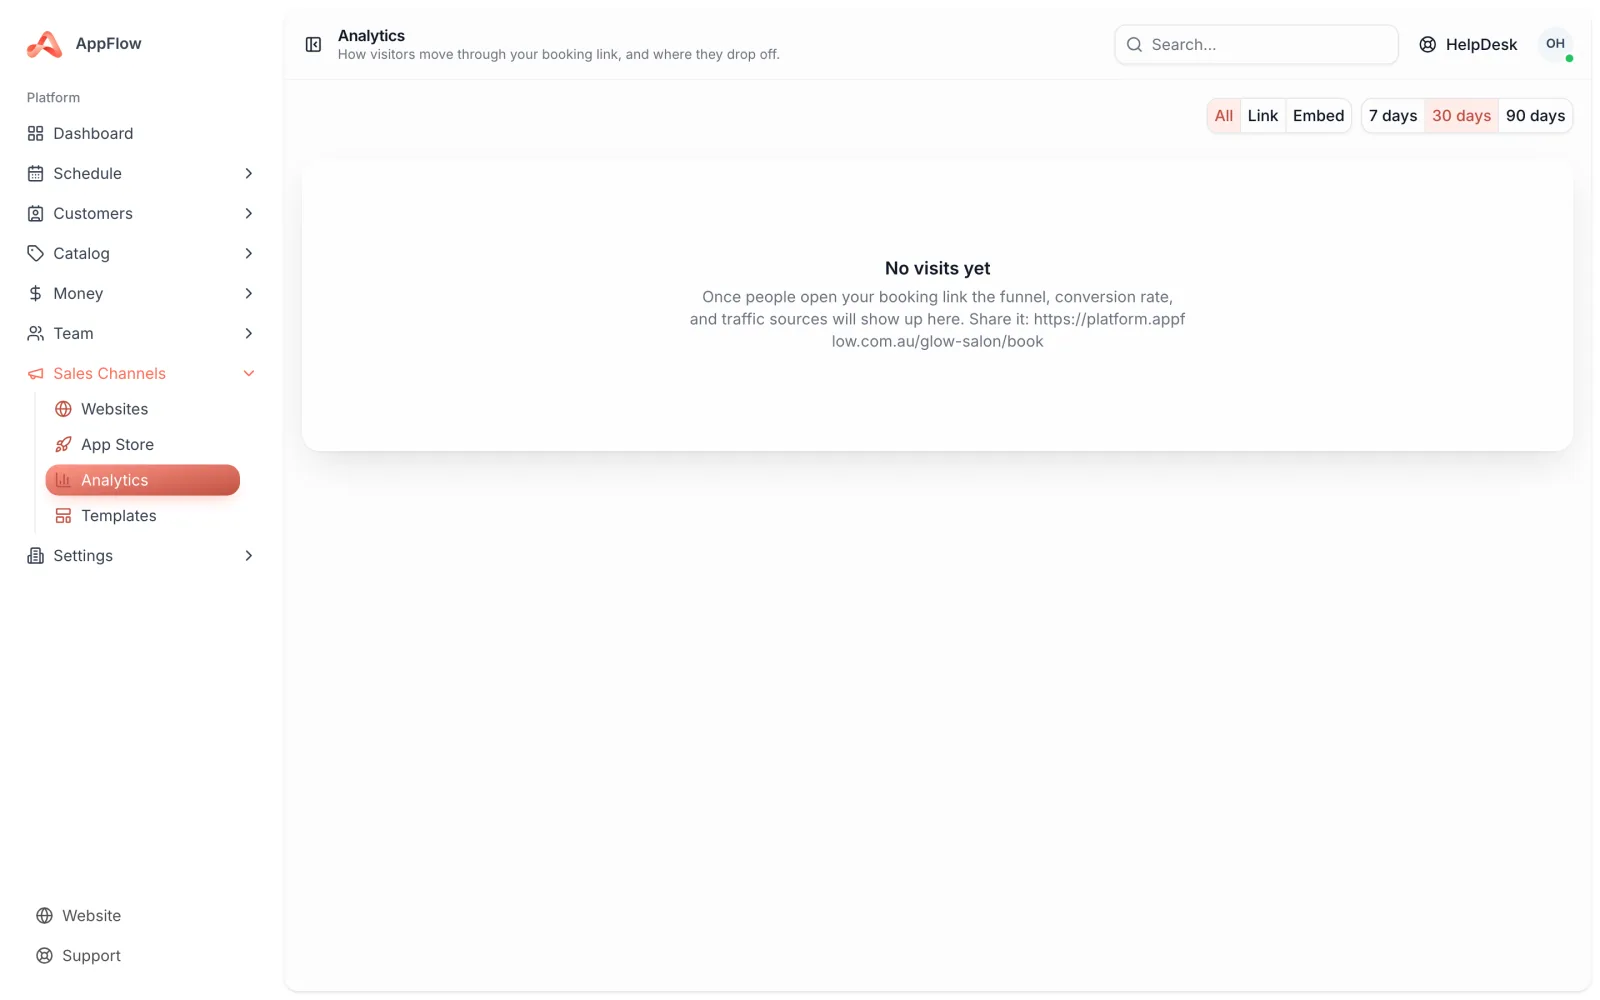
Channel analytics shows how visitors move through the flow and where they drop off, split by the link and the embeds. You get sessions, conversion rate, a step-by-step funnel and your traffic sources, so you can put your effort where the bookings actually come from.
6. Check it on a phone
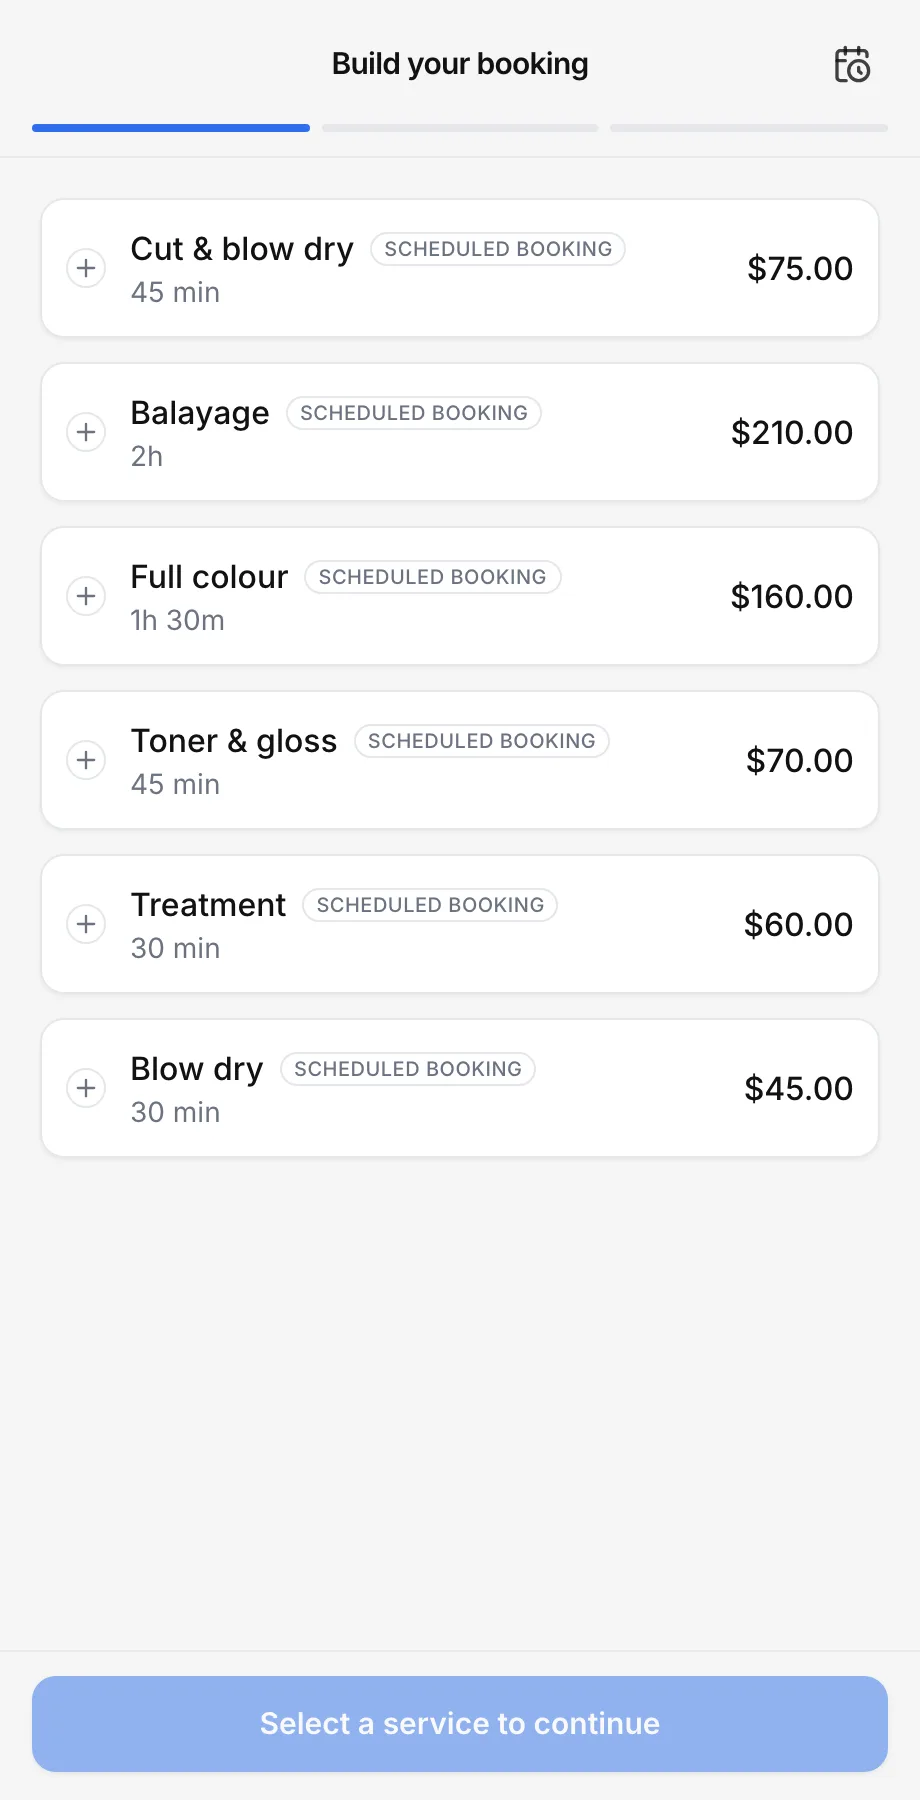
Most customers will book on a phone, so open your own link on one and walk the whole way through. Check your service names read well at small sizes, your prices and durations look right, and the confirmation email arrives as it should.
One calendar, every channel
A booking from your link, your website embed and your front desk all land on the same calendar, with the same reminders going out. There is no second system to keep an eye on.
Was this guide helpful?
Still stuck? Contact us